Sunday, December 29, 2013

I'm Sorry Crafters, I've Been Cheating on You


I am very, very sorry.  I didn't mean for it to happen.  One day I was inking, trimming and gluing and the next minute, I was obsessed with another.  Yes, I've fallen in love with Legos.

Our cable and internet was out for a few days and to pass the time, I started sorting my son's tens of thousands of Legos; something I have daydreamed about doing for years.  It was so cathartic that for days after our technology was up and running, I continued to separate each and every piece into a system of organization. 
I found these little drawers at the Dollar Tree!
Picked this cart up at Michael's for 60% + another 20%= $30!
Then Santa brought me my very own Lego set.  I had never built a set of my own so it was new and exciting.

Well, lets just say Legos had me at hello.  I started assembling and my heart skipped a beat.  Tinkering with color and texture and design was a familiar kind of wonderful but the unexpected surprises that came about by following the building instructions was such a rush.  Within a few days I had sore fingers, an amazing mini city with all kinds of cool features and lots of new skills for creating Lego details.


Since that first set, I have taken apart and rebuilt several of my son's sets with a wonderful sense of satisfaction.  It has been a guilty pleasure, but I realize I cannot neglect my craft life any longer.  Without paper, glitter, Cricut and bling, I am not my true, authentic self.  So I am here, hat in hand, ready to create the very best crafts I can.  I will make it up to you, I promise.

Thursday, December 19, 2013

Our Elf on the Shelf has a Sense of Humor

We have a lot of fun holiday traditions at our house. Here are just a few:
  • Every Thanksgiving Day, we put up our Christmas tree (or at least we start talking about it). 
  • Once the tree goes up, the kids put on three ornaments a day so we get to decorate all month long.
  • The kids cut out snow flakes and tape them to the walls throughout the month of December.
  • We spend at least one Saturday (usually two) listening to Christmas music while doing Christmas crafts.
  • We set up a ceramic Christmas town on the coffee table and take turns rearranging it.
  • We invent new lyrics to Christmas carols and have a sing off.
We have a two new traditions this year that have really added a lot of fun to the season.  The first is the 12 days of Christmas wall I created for the kids.


The upper row has gifts for Eva and the bottom has treats for Aidan.  Each stocking, bag and pouch has an initial and a number. Some of the stockings and bags are store bought from past Christmases and some are hand sewn and hand made from Cricut cuts. I filled them with little goodies from the Dollar Tree and hand made ornaments I make while they are at school.

The second new tradition is the Elf on the Shelf.  We have had the set for several years but we never got around to playing with it. Eva used the Elf as one of her dolls for a whole year but otherwise the box never made it out of the garage.

This year we decided to see if the Elf on the Shelf thing was real.  I told the kids I was really skeptical and suspected that their friend's parents might be moving the elf each night, but they convinced me to give it a try.

You can imagine my amazement when the elf moved after that first night.  I thoroughly interrogated the children to make sure they did not get up in the middle of the night to move the Elf and they denied it 100%.  I have to say, I believe them. The elf has moved every night since we first put him out and boy does he have a sense of humor.  Check out our Elf and his daily rest stops:


I cannot wait to see where he ends up next!

Wednesday, December 11, 2013

Ribbon and Paper Christmas Tree Tutorial

I was so flattered when Principal Renken asked me to lead a workshop for the teacher's during their "In-Service" day.  My kids have attended St. Timothy's for the past 6 years and I am so grateful for their contribution in molding my little people into the wonderful humans they are today.  It was such a pleasure to get crafty with them.

This is the project I taught to the teachers.  Everyone seemed to enjoy themselves and I just *LOVED* how each person added their own flare to their project.
I purchased the cones from Michael's.  I found them in the wood/ paper mache' section (meaning the unfinished craft paper shapes and boxes).  They had several sizes but the largest was on clearance for $1.29, so I bought them all.

I had both ribbon and paper for the teachers to use to decorate their trees.  I bought some of the ribbon at the Dollar Tree and some at Michael's when it was on sale for 60% off.  Most of the paper was Martha Stewart's double sided holiday collection, but I also offered Recollections Christmas paper (single sided) for those who did not mind having white on the interior of the "paper loop."

To make these trees you need the following:
  • styrofoam or paper mache' cone
  • strips of ribbon or paper cut into .75 or 1 x 6 inch strips
  • glue gun
  • green pain and sponge paint brush
The process is quite simple but a little time consuming if you cover all of the cone.
  1. Start by dry brushing your cone.  Make sure you spread the paint all over the cone so that it is more like a stain versus a coat of paint.  Use a paper towel to rub over the tree after your 1st coat to remove any extra paint.  This will help your tree dry rapidly so you can apply a 2nd coat in a little while.
  2. While you wait for the paint to dry, cut your ribbon and paper into the .75 or 1" x 6" strips.  I prefer the thinner strips but it is just a matter of preference.
  3. Go back over your cone again with another thin coat of paint (optional).  Try using a different shade of green to spice things up.
  4. Fold your strips of paper or ribbon in half so that the 2 ends meet but DO NOT CREASE AT THE BEND!  Let the fold retain its curl at in the middle.
  5. Use your glue gun (or glue dots) to adhere the 2 pieces together NOTE: you can use wet glue, glue dots, double sided tape or a tape runner to adhere the edges together, but we found the absolute best way to ensure the hold was to use the glue gun.  All other forms of glue had at least one or two problems (some a great deal more) adhering together.
  6. Once your tree is dry, adhere (again, glue gun is best) the loops to the cone starting at THE BOTTOM. The spacing between loops both horizontally and vertically is entirely up to you.
  7. Add extra touches like ribbon wrapped around the cone horizontally and a bow or a star at the top.
  8. To make the star, I used m Sizzix to cut out 2 stars which I glued together at 3 points, leaving a hole for the tree top to slip in to.  I hot glued it onto the top of the cone so it would stay in place.
And there you have it.  More fun stuff to come. Jingle, jingle

Monday, December 9, 2013

Cricut Christmas Card challenges

 
This weeks challenge on the Fantabulous Cricut Challenge Blog
is to create a Christmas card.  Last week we had a similar project sans green or red (see below), so I was very familiar with all of the Christmas images on my cartridges.  I have quite a few to work with but I just wasn't feeling inspired, so I decided to do an outdoor scene of Christmas.  I selected the city scape from Formal Occasion,
and I mounted it on dark blue glitter paper.  I put tiny gems along the outside of the buildings to look like strung Christmas lights.  It took forever to get the right arrangement for the Christmas lights and when it was all done, the proportions of the gems to the buildings were too far off. I scratched that card and started working on a different approach.

I loved the idea of a big building strung up with Christmas lights but I didn't have a Cricut cartridge with a skyscraper.  I used my Gypsy to manipulate the cityscape from Formal Occasion but it didn't work like I wanted it to so I decided to cut out a high rise building by hand.

I was really pleased with how the building turned out once it was mounted and had lights draped across it but it was missing a critical element...A Cricut cut!  Then I got an idea. I pulled out a reindeer punch and created a night sky with Santa approaching the building...Rudolph "with his nose so bright" leading the tow.

I used the Imagine Buccaneer cartridge and cut out Yo Ho Ho to make Santa's Ho, Ho, Ho... The cut pulled everything together and lead into the interior text perfectly.  I love it when a series of random ideas formulate into a complete concept. 

So that is how I put together my holiday card and it is a good example of how you can use cartridges beyond their suggested uses.


Now last weeks challenge for FCCB was "Beyond Red and Green" meaning create a Christmas project without the use of red or green.  This is not as easy as you might think, especially when you are integrating a Cricut cut and trying to make an original design.  Thank goodness I had the Winter Wonderland cartridge because there were lots of designs that worked beautifully with silver and gold.
I chose the phrase "Believe" and added a bell.  I used a few different shades of silver, gold and cream to accomplish the look.  I love this cartridge because there are quite a few layers to work with for each image.  This allows you to tinker with the look and feel to best suit your project.  I assembled my layers with adhesive and foam dots so that their was nice dimension.  I mounted the assembled artwork on an Anna Griffin card and voila, Christmas sans rad and green.

Sunday, December 8, 2013

Create and Innovate Goes Public

I designed the Create and Innovate program in 2010 after my fellowship with the Institute of Innovation.  We have been teaching this enrichment program at St. Timothy's Lutheran School ever since. It is such a popular program that sometimes the parents stay to do projects along side their kids instead of using the 2 hour break to hit the gym or run errands. I even had the pleasure of teaching a Create and Innovate class to the school faculty last week!  What a hoot!

Today, my partner, Maggie and I learned that Booksin Elementary, a San Jose Unified public school has accepted our program into their enrichment curriculum beginning in Jan 2014.  Breaking into the public school system is no easy task and it is a real acknowledgement of the success of our classes.

I spent the afternoon redesigning our website (above) and creating a online registration form.  It is very exciting!  Pop over to see how it turned out.

Thursday, December 5, 2013

Do you want Craft Gossip?

Do you subscribe to Craft Gossip? If you don't, your should!  It is the only daily email that I never delete and always, always read!  I can't tell you how many amazing ideas and websites I have been turned on to (and actually tried!) from this dynamite resource.  Below you will find just a few of the fabulous ideas that I collected from only 2 days worth of newsletters.  I have even had a few of my own blog posts included in their newsletter which has directed a lot of traffic my way!  Be sure to submit your own great posts here.  Now I'm off to try my hand at those adorable angels...

DIY Wire Angel Ornaments

By Vikram Goyal on Dec 05, 2013 10:55 am

DIY Wire Angel Ornaments
Charming and so easy to make, learn to create these wire angel ornaments via this tutorial of AdventuresOfADIYMom. The idea came to Rachel via Pinterest, but she had definitely made it her own! As with most ideas on Pinterest, the links didn’t go anywhere.
Luckily, this link below should give you all the instructions you need to make your own …

Continue Reading »

Easy Christmas Lights

By Carolyn Bickford on Dec 05, 2013 10:00 am

M&M Christmas Lights
Christmas Lights are so pretty and yet can be annoying when one goes out. Here is a fun set of Christmas lights that you never have to worry about the lights going out. Although you might have to worry about the lights disappearing. This is also a fun craft that you can do with the kids. Beth shows you all …

Continue Reading »

Tutorial: Bows from Scrapbooking Paper

By Heather Holbrook on Dec 05, 2013 09:09 am

Tutorial: Bows from Scrapbooking Paper
Turn those extra strips of pattern paper into the perfect bow for holiday packages! The Glue Dot blog has a quick and easy tutorial for making them.
-Heather…

Continue Reading »


Freebie | Holiday Cursive Word Art from Pink Trike Design

By Francine Clouden on Dec 05, 2013 08:00 am

Freebie - Holiday Word Art from Pink Trike Design
I love this set of Cursive Holiday Word Art and plan to use them in my December Daily this year. They come compliments of  Robyn Meierotto of Pink Trike Designs and are great for both digital and paper projects. Go grab them here.…

Continue Reading »

How To Write And Publish A Craft Book

By Shellie Wilson on Dec 05, 2013 05:46 am

how-to-write-a-craft-book-and-get-published

CraftChica shares this article/review on Mark Montana’s new book How to write and publish a craft book. Very insightful and what doesn’t scare you off will surely inspire you. The closest I have ever come to writing a craft book was for crafts with dyer lint. It came to me at the wrong time (Not sure I could …

Continue Reading »

Chocolate Sugar Scrub

By Shellie Wilson on Dec 05, 2013 12:14 am

chocolate-sugar-scrub-8
The temptation to eat this will be great but the desire to soak in it will win you over. The presentation of this chocolate scrub is amazing. It looks delightful I am sure it smells delightful. Full instructions and tutorial here.
I love giving sugar scrubs as gifts as they are so easy to make and always get used. Last …

Continue Reading »


The Right Tools for the Job

By Connie Barwick on Dec 04, 2013 10:42 pm

usetools 
What are your favorite tools as a needleworker? Since cross-stitch is my main deal, I have a few things I can’t do without, including petite cross stitch needles, sharp embroidery scissors, tweezers, and a bin for my thread ends aka orts. Recently over at Eileen’s Machine Embroidery Blog there was a great post about all the tools necessary for certain …

Continue Reading »

Tutorial | Christmas Countdown Calendar for Small Spaces & Traveling

By Francine Clouden on Dec 04, 2013 08:00 am

Tutorial - Christmas Countdown Calendar by Einat Kessler
Einat Kessler shows how you can make a Christmas Countdown Calendar that sits on a table top. This is great if you don’t have a lot of space for a bigger Advent Calendar. it’s also portable, so if you’re traveling this holiday season it’s perfect! Click here to see the tutorial.…

Continue Reading »


A Cozy Christmas: Gift Wrap

By Linda Lanese on Dec 03, 2013 12:46 pm

sweather wrappingsweather wrapping1
Sisters, Emily & Sarah are constantly working to have more efficient, beautiful lives and homes. I am sure you will find their postings fun and inspiring.  Their “Cozy Christmas: Gift Wraps” are such a stunning idea and I am so happy I found them on “Boxwood Clippings” and I am thankful for bloggers that do share their ideas.  Thanks Ladies!…

Continue Reading »

Friday, November 29, 2013

Cricut The Mix and Match button

This tutorial comes from Fantabulous Cricut Challenge Blog.
 Thursday Tutorial: The Mix and Match button & how to use it!
This weeks tutorial is on the mix & match button you find on the Cricut Expression. Recently I was doing a project where I could have really, really used this feature-making it easier on myself and saving frustration. I used to use mix & match a lot, and slowly forgot about it. Let's review its use with Megan at Above Rubies Studio!


Mix and Match button-
•Allows you to use multiple Creative Features at the same time.
This is trickier…the order you select the buttons matters!
•Press Mix and Match
•Next the character you want to cut and then Creative Feature on the keypad

*Character then feature key*
You can only choose one dial size even in mix and match. If you want different sizes, you need to cut and then change the dial size.

 This tutorial is a great memory refresher, with a bunch of cool tips!

Tuesday, November 26, 2013

Just a Little Chit Chat While I'm Working on My Next Crafty Post

This isn't a crafty post I am afraid. I am working on a good one full of photos but in the mean time, I thought I would share a story so I can post a photo that made me laugh so hard I almost peed my pants.

My poor Maine Coon.  I have two long haired, but one is an albino and he has been itching and licking much more than usual so his beautiful long white coat is now fashioned like a poodle.  It is too pathetic to post a photo and I don't want anyone to think I am neglecting my animal.  I am not. I adore my kitties.

He is still super playful, cuddly and eating just fine.  He isn't depressed and while we have had our share of drama in the Isaacs' household recently, I don't think he is stressed out.  I know it isn't ring worm because the location is off, plus his brother is just fine.  Because of this, I decided that before I took him to the vet, I'd talk to my guy at Petsmart.  As usual, he was super helpful.  We are looking at 2 things:
  1. At the time the licking increased I made a couple changes.  One was that I bought a different brand of cat food and it wasn't the fancy stuff.  I was out of food and it was late so I went to Walgreens and bought a bag from their limited selection.  It could be that White Kitty is having a reaction to the wheat- yes its weird, but he may be Gluten intolerant. (Btw- his name is Paris but I like White Kitty better.  His brother is an orange Maine Coon named Bo and I call him... [surprise!] Orange Kitty.  My kids hate it but IMHO my names are really sweet, very enduring and authentic to who they are as individuals...but I digress.)  So I bought the rice based food in hopes that it will help.  We will have to wait and see.
  2. The other change was that I bought the Costco flea treatment generic for Frontline.  It was $50 cheaper and I like other Kirkland products so I thought it would be OK. Petsmart guy said a number of his customers have had trouble with it.  Unfortunately, we just treated the cats last week thinking an allergic reaction to fleas could be the culprit so I have to wait another 3 weeks before I can start using the Frontline again. 
That being the case, Petsmart guy suggested a nice Oatmeal based shampoo until the new food kicked in and the new flea treatment could be used.  The shampoo was $15. I passed because I knew if I googled it, I could find a homemade recipe. Amazingly, there were many to choose from.  I love the internet! This is the one I think I will try

Which gets me to the photo I stumbled upon that lead to this little ramble...  Ta Da....
This made me laugh out loud. I just had to share it.  That is all.;o)

Sunday, November 24, 2013

Brief Absence Extended By Job Related Injury

I guess most jobs have a risk of injury. Desk jobs have ergonomic issues. Bakers have more oven related risks. Electricians might get electrocuted. Even a mailman is at risk of dog bites.

The crafter also has potential job related risks like getting burnt by a glue gun or in my case, cutting themselves with a craft knife. Unfortunately, just a week after after my son recovered from his nearly 2 month battle with a bone infection, I amputated the pad off of my index finger. There are cuts, there are deep cuts, there is severing, and then there is the amputation where the area removed will not grow back, nor can it be reattached. The latter was what happened to me.

I was rushing to teach a 
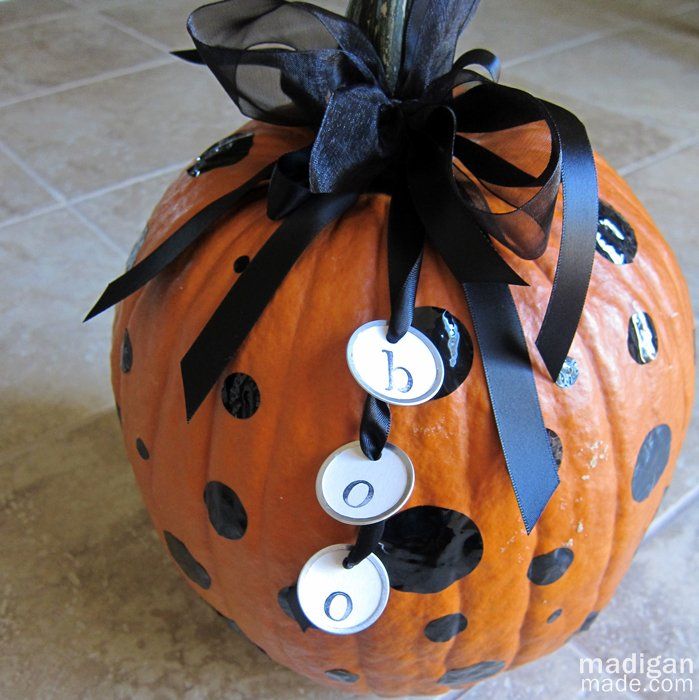
Create and Innovate family class in which we where painting pumpkins and creating "inchie collages." I needed to cut poster board and it wouldn't fit in my trimmer, so I used my T-square and Exacto knife. I was cutting through multiple sheets, so I put in a new blade. I miscalculated my finger positioning in my haste and sliced off the front of my left index finger; the pad. The cut removed almost all of the meat (for lack of a better word), bled like you would not believe and hurt like a 4 alarm fire. There are sooooooooo many nerve endings on the pad and every last one was screaming its head off!

Fast forward 7 weeks, and I am still unable to use my left hand for a majority of tasks. I can't dig in my purse for keys, use my left hand to rub in shampoo, put my hair in french braids, button tight jeans, seal a zip lock bag, etc, etc.

I feel ridiculous using such a serious, dramatic tone about this injury. "I cut my finger", "I can't type by touch anymore", "whaa, whaa, whaaa!"
It just sounds so silly. One does not realize how the index finger leads the use of the hand. When the brain tells the hand to move the fingers, the index finger is the captain of the team. You might send signals that say "everybody but the index", but the index will go regardless. In many ways, it has left me without a left hand, and even now, it still hurts like a bad burn when it comes into contact with anything. The cast is helpful but it inhibits healing so the Dr. doesn't want me to wear it unless I am doing an activity that will inevitably cause contact with my finger.

I have adjusted to getting things done without touching the pad area and am more patient with myself.  It is what it is and I'm told it will take 6 months before it doesn't scream when I hit it.  My finger print is gone so if I want to start doing 1 finger theft, I could do OK.  I'll always have a deformed looking finger profile-  I can live with that.  My biggest boo hoo is that I won't ever get feeling back in that area and the index finger is a major instrument for experiencing touch.  That sucks.  But, when using a glue gun it could be an advantageous.

So that is my story.  I hate that I left my blog unattended. I always find it frustrating when I follow a blog and then they stop posting. I really don't mean to be flakey- I just found myself bogged down with a bunch of excuses.
- Everything takes me so much longer to do so I find myself with very little free time - folding clothes, doing dishes, making lunches, sweeping the floor...even now these tasks are a challenge and take forever.
-Typing is difficult -right now I am pecking and my brain is moving much faster then my hands.
-I have been a little depressed and overwhelmed - my inner dialogue has been very negative and frustrated.

Valid as these reasons are, I don't feel good about disappearing as I did and want to apologize to my readers and Fantabulous Cricut Challenge Blog.

On a more positive note... I did continue to work during this time. I had a commitment to teach 4 classes a month and I needed the moo-la so I took care of business.  I had a lot of help!  I created a couple of fun projects.  Below are photos of the haunted house I taught in October.

I also have pics of the kids making their houses.  They turned out AWESOME!!  I'll post more photos this week now that I'm back in the saddle.  I look forward to reconnecting with you and look forward to crafting together!

Thursday, September 19, 2013

Brief Silence

Just wanted to let you know that I won't be posting this week as my son, Aidan is in the hospital with a bone infection. Hopefully the MRI will show that the infection has not penetrated the bone and they can take him off of IV antibiotics and send him home on Saturday with pills.  Please keep him in your prayers.

Sunday, September 15, 2013

CRI-kits and MAR-kits Pens are Super, Duper Fun


This week's challenge on the Fantabulous Cricut Challenge Blog
is A,B,C's and 1,2,3's. I decided to use my CRI-kit and MAR-kit pens in conjunction with chipboard letters.  I wanted to create a sort of "old school" look while playing with the A,B,C motif. 

I made a card for my daughter which she *LOVED*!  The design was whimsical enough that it gave me an opportunity to use some of my of the products I have been hoarding like baker's twine, 6 x 6" paper pads and notebook style scrapbooking paper.

This was the first time I had used the font from the Cricut cartridge "Designer's Calendar."  Instead of cutting out my words, I used the Mar-kits to draw them.  Then I went back over the words with a black CRI-kit gel pen to outline each letter.

It took me a minute or two to figure out the nuances of the various font options.  The letters vary in proportions and spacing so I used my gypsy to adjust the kerning and sizes to get the look I wanted.  To keep the script flowing like handwriting, I welded the letters together.

The interior of the card reads "D is for daughter.  I love you my sweet girl... from a to z and back again!"

Click the icon below to purchase a set of CRI-kits and/ or Mar-kits.  They are so easy to use and have a spectacular look on Cricut projects!


Thursday, September 12, 2013

20 Unique Ways to Use Vinyl

There are so many ways to use vinyl!  Here are 20 unique ideas...
  1. On the glass inside of a frame.
  2. On Christmas ornaments. 
  3. On your propane tank. 
  4.  On baby wipe cases.
  5. On mailboxes.
  6. On clothes hangers.
  7. On rain boots.
  8. On your headboard. 
  9. On plastic cones.
  10. On a fishbowl. 
  11. On a trashcan.
  12. On a white board.
  13. On a moped. 
  14. On pumpkins.
  15. On a bike helmet.
  16. On the ceiling fan.
  17. On the toilet.
     

  18. On the washing machine.
  19. Knobs.
  20. Binkys.